

I’ve been working on the first photograph from Rosie’s bird adventure – the photo where she’s flying off with the bird.
Here’s where I started.

Just me, holding Rosie and the falcon above my head while I photograph upwards.
For Rosie’s dream shots, I always use a painting in the background. For this episode, I’m using Klimt’s paintings.
To replace the background, I need to use Photoshop to select out Rosie and the falcon, which is always a hassle because Rosie has that crazy hair. This time, after finishing my training on selecting objects in Photoshop, I use the magic wand instead of the quick select. I’d never tried the magic wand before, but it turns out to be perfect for this kind of thing because it selects all pixels of similar colors. Since the sky is blue, but there’s no blue in the main objects, I click the magic wand on the sky and everything but Rosie, the bird, and the trees is selected. Then I invert my selection (to select everything but the sky) and copy it to a new layer. Finally, I select the trees with the quick select tool and delete them, since they’re going to be hard to match to the new background.
For the background painting, I use Bing to search for images. Bing isn’t my usual search tool, but it has a filter for image size, so I use it when I need to search for a high resolution background image (which I need if I’m going to fill in the background in a high resolution shot). I end up using the one which looks most similar to the background in the shot – a painting called “Fruit trees.”

Based on the cinematography book I’m reading, the bird is approaching from the wrong side of the shot. This is the “difficult climb” angle (from bottom right to upper left). I want an easy climb, so I flip the image horizontally in Photoshop, and then use transform to slightly increase the climbing angle. I also use transform to change the angle of the background image, to match the angle of the trees in my original shot.
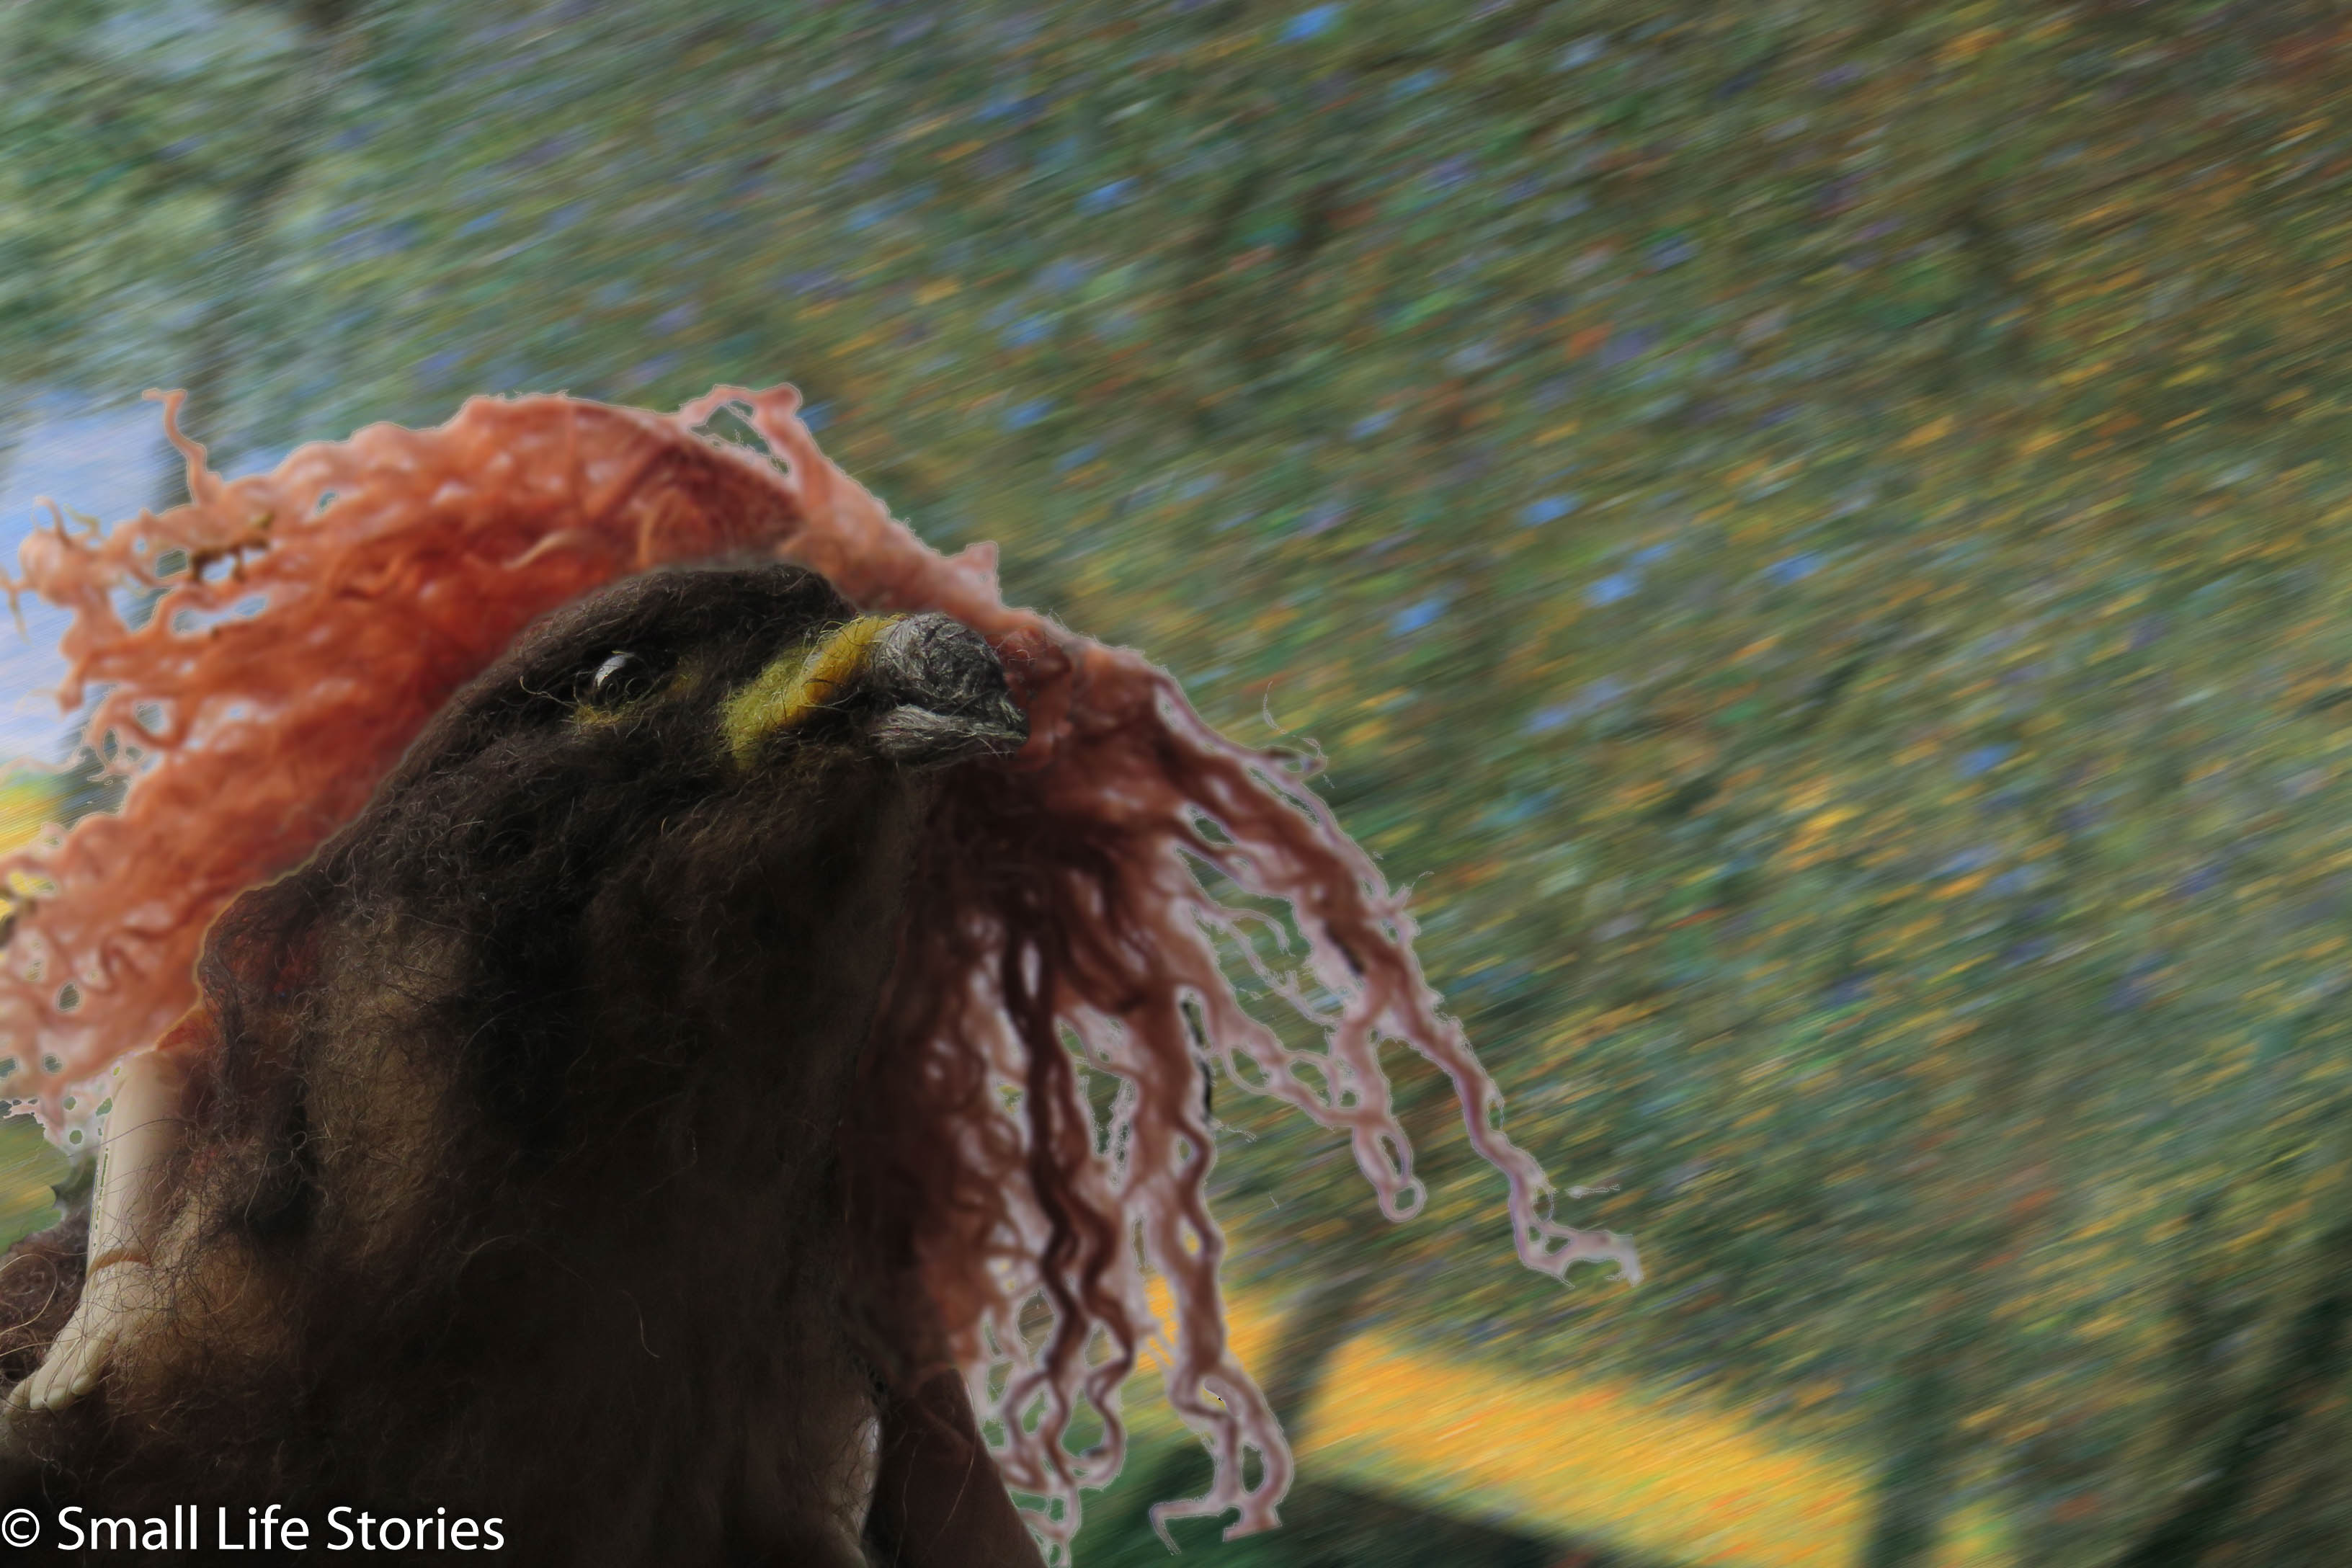
My last step is to blur the background a bit to give the impression of flying. I’m using a motion blur filter (just on the background) at about 45 degrees.
I spent a long time trying to get the strands of Rosie’s hair to look right, but I haven’t figured out how to paint a bit of blur – I guess I’ll get that in a later lesson.
Anyway, here’s the finished shot.
Now I just have to match up my bird figures with my Klimt paintings and see how the story shakes out. For Rosie’s dreams, I only plan out the subject and the gift she receives at the end. The rest of the frames are dictated by what objects I have and what paintings I can find.

I can’t tell you how helpful this is! I think I’m going to print it and save it as a reference. Brilliant! I’ve been using PhotoShop for 25 years? Something like that… I’ve never explored it too much. I don’t use it for photography but for working with images captured with a camera on the microscope for my research. These need to be fairly unmodified to retain their validity for measurement so I’ve never delved too deeply into it. This is great stuff for me!
LikeLike
I realized that I was spending a ton more time trying to use the tools badly than I would spend learning how to use them correctly. I think the whole “selecting objects” chapter took me an hour total. I’ve probably wasted more than that doing a single photo wrong. It does make me wonder if I ought to go back at some point and fix my old mistakes, or if I just leave the whole story as is, when I’m done, and move on to the next.
LikeLike